Showing posts with label Dashing Diva. Show all posts

Nail Art: Halloween Polka

I can't believe October is almost over ... and so is my mini project to create Halloween nail designs for the entire month. This would probably be my last Halloween inspired nail art for the year. But I'll try to squeeze in another one if I have time before Halloween day itself. :)

If you want something simple and chic for Halloween, I think this might be a perfect idea. It is easy to do and it looks like full nail art stickers too!

Halloween Polka Nail Art Design
Halloween Polka Nail Art Design by Simply Rins


Base color is 2 coats of Orly Liquid Vinyl. I am not so fond of this black polish. I make more effort to apply a decent coat. Or perhaps I purchased a bad bottle?

This Halloween nail design is a play of colors. I used black, orange, and yellow. Dashing Diva Tangie Tangerine Thalia for the orange and OPI The "It" Color for the yellow. Also, I only used a dotting tool for this nail art!

Halloween Polka Nail Art Design


To recreate this Halloween polka dots design, alternate 2 colors when dabbing dots into your nails. I suggest doing a polka dot design with one color first instead of immediately alternating colors. Just make sure you space the dots appropriately to accommodate the 2nd color. I also recommend creating smaller dots as they are easier to work with, especially when you reach the edges of the nails.

Halloween Polka Nail Art Design


I find this Halloween nail art design simple, attractive, and classy all at the same time. It is quite easy to do too! What do you think?
Nail Art For Beginners (Polka Dots)

Some friends and readers have sent me their concerns regarding do-it-yourself nail art, specifically freehand nail art for beginners. I say this, if the passion is there, I believe everything else will fall into place eventually.

First, I think we need to establish our definition of nail art. In my opinion, any form of decoration one puts on her nails is considered nail art. The mere application of nail polish is nail art, don't you think so? The vast choices of colors is enough to give a girl an headache just to make a decision which shade to wear.

There are a lot of ways to do nail art. But for this article, I'll try my best to address the concerns of those who would like to try freehand nail painting. Hopefully, this will be helpful.

I think the hardest to decide on is where to start. Personally, I recommend working with something quite easy to practice with -- dots! One will be able to do several nail designs with dots. Although dotting tools may seem a requirement, it is not. You may use a toothpick, a dry pen, or even an end of a make-up brush that you're not using already.

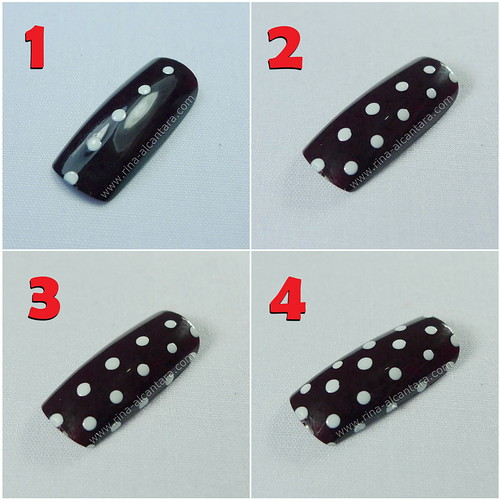
Here's a tutorial on how I paint polka dots:

Nail Art Polka Dots For Beginners 07
1. First, based on experience, I find it easier to start in the middle of the nail and work your way down.

2. Next, draw dots on the left or right side. Make sure you alternate the horizontal alignment of the dots from the first dots you drew in the center of your nail.

3. Continue painting the dots using the the method mentioned in step 2.

4. Enjoy your polka dots nail art!


Christmas Nail Art: Wreaths

Today's Christmas nail art is religiously inspired. I still wanted to create a Christmas nail design that would showcase the popular colors of the holidays -- red, green, and gold. I also wanted something consistent on all nails. And so, no accent nails for this particular Christmas nail art. Since we put up decorations during the holidays, I decided to decorate my nails with Christmas wreaths!

Christmas nail art
Christmas Wreath nail art by Simply Rins


I used Lucidarling White as base color. You may choose to use other shades of white polish for your base. But I do like this particular shade because of its shimmer that adds something extra that's apt for the season. :)

Nail Art: Harry Potter Characters

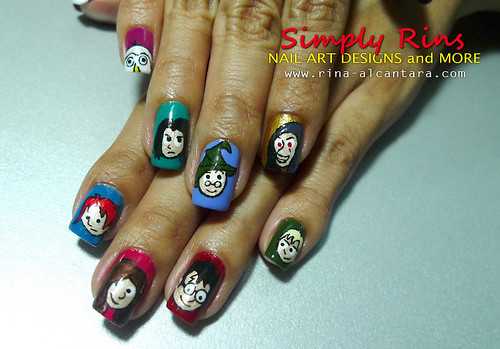
I confess that I went a little crazy and decided to do another Harry Potter nail art with 10 characters from the movie. I must say that this is perhaps the hardest challenge I gave myself. Freehand painting Harry Potter characters on my 10 nails tested my endurance. It took me hours (many!) to finish this nail art design. Yes, this is how much I love the Harry Potter series! :)

Since I don't have any false nails to practice with, what I always do is draw my designs on paper first. Sometimes, I use colored pens to have an idea what it will look like in colors. This Harry Potter nail art, is again, in cartoons! I hope you will be able to recognize the characters.

Presenting ...

Nail Art Harry Potter Characters 02
Harry Potter character nail art by Simply Rins!


As you can see, I also went crazy with the base colors. I think it has to do with the fact that I'm trying to cheer myself up. I'm feeling quite low recently.

Nail Art: Christmas Gift Boxes

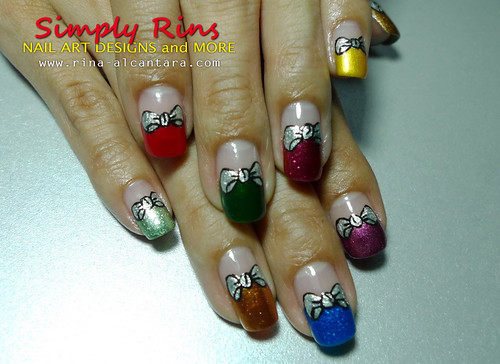
I know it's not yet December, but I submitted this nail art design to a nail art contest that asked participants to paint our nails that depicts our favorite part of the holidays. I'd like to share this with you. I chose Christmas and since I belong to a non-traditional family, I find that gift wrapping is one of the ways I can express my creativity (aside from nail art) during this joyous season. Yes, we really don't decorate. :)

And so I came up with this nail art design:

Nail Art Christmas Gift Boxes 11
Christmas gift boxes nail art!


I just realized that I'm into a multi-colored nail art phase! My previous Caronia Butterfly Nail Art also had a different shade of nail polish per nail! Hmm, I think my mood is trying to cheer me up through my current nail designs. I wanted to create something simple but lively that's why I opted to paint each nail a different color. The colored the bow the same shade on all nails to have something constant. I felt having different colors for the bow will make the design confusing.

Nail Art: Peeping Pumpkins

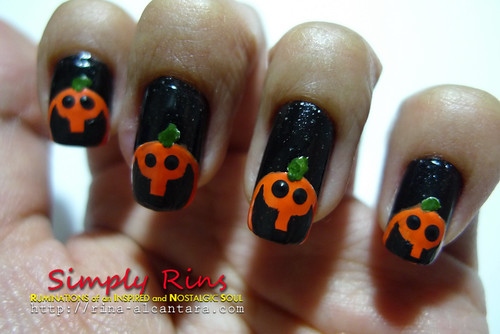
Halloween will not be the same without carved pumpkins. And so, for my 8th Halloween nail art design, I decided to do a Jack-O-Lantern or pumpkin inspired nails. We really don't have an actual big squash here in our country but it has been a consistent Halloween decor.

This nail art is yet another black and orange combination.

Nail Art Halloween Peeping Pumpkins 06
I call this Peeping Pumpkins.


If you've been a follower of this blog for quite some time, you would have probably noticed how I enjoy accent nail arts. And most of the time, I use my ring finger as the accent nail. But ever since the Halloween Nail Art Crawling Spiders, I've been in the mood to do freehand nail art wherein I paint the designs on all 10 hand nails!

Here's how the base color looks bare:

Nail Art: Halloween Too Many Mummies

This is my 7th Halloween nail art for my project this October. I have to say that this is not my original idea. I've seen a few nail art enthusiast like myself who already did a mummy inspired nail art design. I really just wanted to give this a try. And so, here's my version of the mummy nail art!

Nail Art Halloween Mummies 07
Simply Rin's version of a mummy nail art!


Forgive me, out of excitement, I forgot to take a picture of how the base color looks without any design. But I've used this base color before when I did my first Halloween nail art -- Spiders. This is an almost white shade from Dashing Diva named Charlotte's Wedding.

Here's a tutorial on how I did my mummy nail art:

Nail Art: Halloween Crawling Spiders

Eleven days to go before October ends and this is my 6th Halloween nail art! I have a few more Halloween characters I'd like to feature here but I just need to do another spider nail art! The idea came the other night while my sister and I were lounging at our living room. We just came from dinner and since our television was under repair, we just sat there, played with Mumay (my sister's dog), and did practically nothing. It was raining and I guess this sort of weather makes people really weary?

Speaking of the weather, our country has been hit by Typhoon Juan (international name is Megi) yesterday that greatly affected the northern part of the Philippines. There have reports of people who died due to this natural disaster. Please pray for us and the safety of those who live in the provinces that were largely affected by the storm.

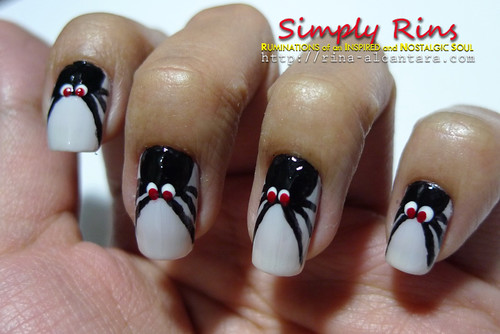
I simply call this Halloween nail art Crawling Spiders. Here's why:

Nail Art Halloween Crawling Spiders 07
Spiders are crawling out of my nails!


I don't particularly like spiders. But for some strange reason, I keep wanting to do Halloween nail designs with them! No accent nail for this nail art. I've decided to practice my freehand painting and wear spiders on all my nails!

Here's how the base color looks bare:

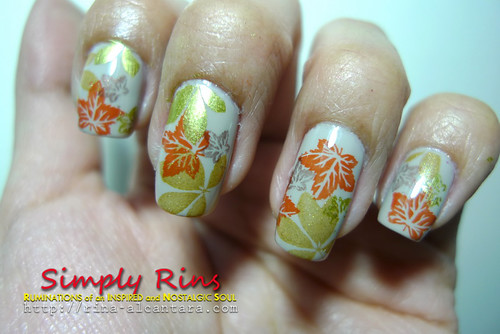
Nail Art: Autumn

This is another nail art I wore last week that I wasn't able to post because of my busy schedule. I meant to submit this as an entry to a nail art challenge but I failed to submit it before the deadline simply because I forgot. The challenge was to create a nail design that is autumn inspired.

Nail Art Autumn 06
Fallen leaves for this autumn inspired nail art.


This is how the base color looks bare:

Nail Art: Halloween Spiders

It's October! And as promised, I'll be posting two nail arts with a halloween theme every week for the whole month of October. Hopefully, I won't ran out of ideas. I'd like to share my first halloween nail art today, the 1st of October.

nail art halloween spiders 02
I think one spider is enough. I don't like my hands to look so scary.


Here are the base colors:

Nail Art: Silver Lining

My friend got married last weekend and I couldn't be happier for her. With everything that she'd been through, she deserves a happy ending. I'm still waiting for mine, hopefully it's just around the corner.

I wore two nail arts with the wedding colors, i.e. purple, apple green, and silver already and I wanted something new for the wedding day itself. Well, mainly purple and apple green. And so I decided to wear something silver.

Nail Art Silver Lining 01
This is a layer of base coat, 2 coats of Dashing Diva Shiny Silver, and a layer of top coat. I didn't apply this myself. It was the polish I brought with me when I visited Nuvo Nails a day before the big day.

Nail Art: Bridal Shower

Remember my Nail Art: Bridesmaid nail art? Well, this nail art is very similar to that in terms of motif. Last week, I helped in organizing a bridal shower for a close friend who's getting married in less than 2 weeks! It was a small gathering of the bride's closest friends and we decided to decorate the room with the wedding's colors, i.e. purple and apple green. This is how the room looked liked:

Nail Art Bridal Shower 08
Champaca Room at Club Filipino after we decorated it.


The night before, I just had to do my nails for this occasion with the color motif and this is what I came up with:

Nail Art: Bridesmaid

One of my closest friends is getting married next month and her entourage fit their gowns last weekend. Her motif is a combination of purple, sage green, and silver. So during our (my mother and I) nail salon day, I decided to play around with these colors for my nails.

Nail Art - Bridesmaid 01
This is composed of a layer of base coat, 2 coats of Orly Velvet Rope, 2 coats of Dashing Diva Rosario Pistacio, and a layer of top coat.