Showing posts with label Essie. Show all posts

Nail Art: For the Love of Abstract

Some say that miracles happen during new year and I think it's true because by some miracle, I was able to do some nail art. Finally! Before I mumble anything else here, how about I greet all of you a very Happy New Year! I'm claiming 2016 as my year, the year I'll be turning 40! Yay! I can't wait for my life to begin.

So to kick start the year, I decided to do some abstract nail art. I find these designs very timeless and classy. Check this out:

For the Love of Abstract Nail Art Design by Simply Rins

Nail Art: Flowers on the Side

There are several nail polishes sitting on my polish rack that still needs to be used. So the other night, I decided to scan through them and decided to use one for this particular floral nail art. I didn't have any idea in mind yet for the design. I just wanted to be spontaneous. After I did my manicure, I figured I wanted something dainty. I guess something floral will do the trick. I've painted quite a few with this nail design that you can check out here, here, and here. Yes, you can say that this is one of my several nail art designs that I never get tired of recreating. I'm sure most of you can relate to that. ;)

Take a look at the result:

Flowers on the Side Nail Art Design by Simply Rins

Nail Art Tutorial: Rose Buds (Remake)

Almost 2 months ago, I created a rose buds nail design and since then, I have received requests to upload a tutorial. I finally had a chance to recreate the design and prepare a video tutorial.

The first rose buds nail art I did had a white background and the roses were painted in black. For this remake, I used a different color scheme.

Rose Buds Nail Art Design
Rose Buds Nail Art Design by Simply Rins

Nail Art: Brown Ombre and Dots

My first nail art for this year is an ombre. Gradient is a term I often use to refer to this kind of manicure but I was introduced to the term "ombre" that most nail art bloggers say in their posts. Honestly, I really don't know what it means. Thanks to ever dependable Google, I learned that it is a French word for shading.

I have been wanting to do something like this ever since I saw one but at the time, my nail polish stash is very limited in colors ... it is still until now, but has grown a little. When I finally decided to finally try one, brown was the first color that popped in my mind. So I looked for 5 nail lacquers that would create the look.

Here's my brown ombre manicure:

Brown Ombre and Dots Nail Art Design
Brown Ombre Nail Art Design by Simply Rins


I polished the nail on my pinky with the lightest color and the darkest on my thumbnail. You can do it the other way around. It would really depend on your personal preference.

What I like about this nail art is its simplicity. I don't think it can get any simpler than this. If you know how to polish your own nails and you have the colors to work with, this is probably the simplest nail art ever! Also, if you're trying to get into nail art, I personally think this is a good start to be comfortable decorating your nails.

Brown Ombre and Dots Nail Art Design


Here are the polishes I used, in 2 coats each:
  • Pinky: Orly Pure Porcelain
  • Ring: Misa Pay Days Are Happy Days
  • Middle: Orly Country Club Khaki
  • Index: Essie Mink Muffs
  • Thumb: Faceshop BR802

Important things to remember when creating an ombre nail art:
  • Work with nail polishes that have the same finish or texture.
  • The lightest color is not necessarily white.
  • If you can create an ombre nail art with subtle transitions of shades, I think that would look absolutely amazing.

I really liked how my first ombre manicure turned out. I plan to do more soon, especially with my favorite color. :)

After a few days of wearing this, I decided to add a design. Since it is still January, I wanted to wear something with dots. From where I am, we have this belief that wearing polka dots to welcome a new year will bring good luck and wealth. This is also the reason why we fill our pockets with coins too during the new year. Unfortunately, I do not own a single polka dot inspired piece of clothing. How sad is that? But it is never too late for anything, right? So I decided to add random dots on my ombre nails.

Brown Ombre and Dots Nail Art Design


I used white, yellow, and pink nail polishes to create the dots in different sizes. I have mixed feelings with the outcome but I did love the color combination. I'm not sure if I should have used darker shades of colors for the dots.

What do you think?


P.S. My camera is with my sister for the weekend when I did this nail art. Thanks to nanay who lent me her digicam until I got mine back.

Nail Art: Santa Bear

Just a few more days before Christmas and I'm seeing more and more awesome Christmas nail design ideas. I'm seeing lots of glitters, reds, greens, golds, and blues! I was about to choose a red nail polish from my stash but I really wanted to use this polish I recently bought from Digital Traincase during a trip to a weekend bazaar. I still wanted to create a Christmas nail art so I did an accent nail.

I named this freehand Christmas nail design, Santa Bear. Take a look:

Santa Bear Nail Art Design
Santa Bear Nail Art Design by Simply Rins


I painted a teddy bear on the accent nail and added a Santa hat to make this manicure apt for the holiday season. It's too bad the pompom on the tip of hat didn't appear so visible because of the light background I chose.

Santa Bear Nail Art Design


Base color for the accent nail is 2 coats of Orly Kiss The Bride. I would recommend a more neutral color if you decide to recreate this nail design so that the whites on the Santa hat would pop out better.

I used 2 coats of Essie School of Hard Rocks on my other nails. I decorated them with small polka dots using Kiss The Bride. I really liked this bluish gray shade from Essie. I didn't want to overpower the color with bigger dots.

Santa Bear Nail Art Design


I painted the teddy bear with acrylic paints using a detailing nail art brush and some dotting tools. I have been testing a few acrylic paint brands that are available in our local bookstore and there are some that fails me. I'll be writing a separate post on this to address inquiries regarding which brands work.

Santa Bear Nail Art Design


This Christmas nail design may lack the usual festive colors but I think it's a good idea if you want to wear something simple for the holidays. I hope you liked this little Santa Teddy Bear.

Nail Art: Needing Daisies

After a week of giving my nails some needed vacation, I am back with something simple. But inspiration decided to take an extended vacation so I browsed through my previous nail designs and chose something to recreate. I hope you all don't mind. It has been a stressful week and I needed something dainty to look at so I chose to paint daisies again on my nails.

Needing Daisies Nail Art Design
Needing Daisies Nail Art Design by Simply Rins


Base color is 2 coats of Essie Chocolate Kisses. All daisies were painted using acrylic paints and a detailing nail art brush.

Needing Daisies Nail Art Design


This pattern ... I think, makes the nails appear longer. Anyway, these daisies look great when cluttered on the nail tips and can be used to create half moon manicures. I will have to try the latter on future floral nail designs.

Needing Daisies Nail Art Design


I have been getting a few requests for Christmas nail art designs and I'd figured I'll be posting some ideas as early as this month just because I love you all and your requests are important to me. Come to think of it, sometimes it is easier to come up with nail designs with a specific holiday theme in mind.

I hope everyone is having a good weekend. ;)

Nail Art: A Touch of Pink

After my Pon and Zi nail design, I felt the need to do a dainty nail art design to bring some cheer into my lowly mood. My first thought was to create something colorful. But I didn't feel like it. I wanted to wear a taupe shade. But that didn't seem like a cheerful color, right? I decided to add a touch of pink for this nail art through some flowers.

A Touch of Pink Nail Art Design
A Touch of Pink Nail Art Design by Simply Rins


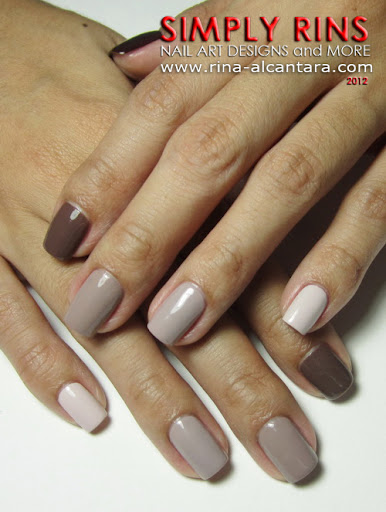
Base color is 2 coats of Essie Mink Muffs. This is the same nail polish I used for my Smurfs Nail Art Design. But I enjoyed the color this time as it showed its beauty more with this nail design.

I used acrylic paints for the flowers. I chose 2 shades of pink and white for the flowers.

A Touch of Pink Nail Art Design


If you are interested how I paint this simple flowers, you may want to check out my How To Paint Flowers Nail Art Tutorial.

A Touch of Pink Nail Art Design


I personally love how the pink flowers worked well with Essie Mink Muffs. The white flowers helped to make the pink flowers become more visible with the a slight dark background. This is another "girly" nail design to a little happiness to my stressful week and I hope it will do the same to you. :)

Nail Art: Smurfs

The Smurfs is now showing in theaters everywhere! Have you seen the movie? I haven't, but I will! And I have to make sure my nails are ready when I do. I literally did my Smurfs nail art design on installment for 2 days because of time constraints.

This is another nail design that I personally painted by hand.

Smurfs Nail Art Design
Smurfs Nail Art Design by Simply Rins


I had a difficult time deciding on the background color. I was deliberating on using white, light blue, and light gray. But something happened while I was trying to choose my base color. A package arrived, containing 3 nail polishes that I recently ordered online from Digital Traincase! It included a bottle of Essie Mink Muffs and immediately (really!) decided to use that in 2 coats for base color. I think the neutral shade of Mink Muffs made the Smurfs or the design pop.

All the characters were painted using acrylic paint.

Smurfs Nail Art Design


I also thought of just having an accent nail for both hands for this nail design. However, I found myself amused after doing one nail that I decided that these cute blue cartoon characters deserves more. So I decided to paint a character on all 10 fingernails! I know that it would take time for me to finish, but I also know that I would enjoy the challenge.

Smurfs Nail Art Design
Gargamel (left) and Papa Smurf (right)


Papa Smurf belongs to my left thumb and I painted the Smurfs' most famous enemy -- Gargamel, on my right thumb. After I finished Papa Smurf, I realized that I got disoriented. I honestly him and Gargamel face to face when I put my 2 thumbs side by side. I already sealed my Papa Smurf with top coat so I really didn't want to repeat it for the sake of position.

I remember my sister and I used to collect small Smurfs figurines when we were kids. I wonder where they are now. This also made me realize that the Smurfs have been around for quite a long ... long time! And I really do find them adorable.

Smurfs Nail Art Design


To make the nail design more interesting, I painted the different Smurfs with different facial expressions. I even painted a Smurf at my left hand pinky in sideview angle. I found it really cute when I was done painting him. I added 2 mushroom houses too, one on each hand. I just can't let this Smurfs' nail art pass by without those colorful cottages. And since I included Gargamel, his vicious cat Azrael should be there! He's on my right pointer finger.

Smurfs Nail Art Design


No, I haven't forgotten to mention Smurfette. She's one of the 3 females in the Smurfs' village, but I think she's most famous one. I actually painted her first as I almost always start with my index finger on my left hand when I create nail designs.

Smurfs Nail Art Design


I was able to take photos of how I painted Smurfette and Papa Smurf. I will be publishing a Smurf nail art tutorial on a separate post. Hopefully, it would inspire you to try freehand nail painting. The tutorial would also showcase how I paint cartoon characters. I will be including personal tips. Don't forget to subscribe so as not to miss on future posts.

I hope you enjoyed this Smurfs nail art design as much as I enjoyed doing it. What do you think?

Nail Art: Spongebob and Patrick

This has been on my list for quite some time now but I haven't gone into doing it until now. This is actually a request from one of you. I'll be trying to squeeze in more requests in the future.

Ladies and gentlemen (if there are that stumbles on this nail art blog of mine), I present a Spongebob Squarepants and his starfish bestfriend, Patrick inspired nail art design.

Spongebob and Patrick Nail Art Design


I made 2 accent nails on both hands. Spongebob on my left hand and Patrick on the other. I used China Glaze Blue Sparrow on all my other nails as base color and Essie Marshmallow on the accent nails. I painted both characters using acrylic paint.

Spongebob and Patrick Nail Art Design


When I showed this design to my friends, one asked why my Spongebob looks stunned. Well, that is my personal favorite expression of Spongebob. I call it the "DUH" look, the times when he just stands still and looks clueless. On the side note, it is easier to paint. Ha! Ha!

Spongebob and Patrick Nail Art Design


Patrick gets a solo on my right hand. I just painted his head. But unlike Spongebob, he is all smiles.

We all know that working with our weaker hand is more difficult. Having this mind, I always try to paint easier shapes on my right hand. Hence, I decided to hand paint Patrick with my weaker hand. You may want to consider it when you're practicing with freehand nail painting so as not to get frustrated working on your dominant hand.

Here is Spongebob on close up:

Spongebob and Patrick Nail Art Design


I wanted a bubble effect on my other nails so I used dots to achieve it. I'm not so sure if I was able to attain that effect though. What do you think?

I was able to take photos of how I painted Spongebob Squarepants. I'll share it on a separate post.

Did you like this version of Spongebob nail art design? What are your thoughts?

Nail Art: Little Pink Pigs

Do you remember my Three Little Pigs nail art design last year? It was one of my first attempts with freehand nail painting. Well, I thought of creating another pig inspired nail design. But instead of just 3 pigs, I decided to paint one on all my nails! Yes, another fun nail design!

Little Pink Pigs Nail Art Design 03
Little Pink Pigs Nail Art Design by Simply Rins


My idea was to paint little pink pigs on my nail tips. I decided to use a dark brown base color for the pigs to pop. I used 2 coats of Essie Chocolate Kisses as base color and I thought it complemented pink really well. Applying the first coat was streaky but the second one covered all the imperfections. It finishes quite shiny too! Lovely color! I can't believe I haven't used this till now.

Nail Art: Flower Power

I'm not really into pink. I barely have pink clothes or personal belongings in that shade. But surprisingly, I was in the mood for something pink on my nails a few days back. So I went to my stash and tried to figured out what nail polish I wanted as base. Sometimes, I come up with a nail design depending on the polish I choose. On other times, an idea comes to mind and the choice of polish comes after.

Anyway, I decided to do a flower nail art design. Let me show you first how it turned out before I tell you what inspired me to hand paint this nail design. I simply called this -- flower power.

Flower Power Nail Art Design 03
Flower Power Nail Art Design by Simply Rins


My inspiration came from Sally Hansen's Girl Power Salon Effects.

Nail Art: Celebrating 150th of Jose Rizal

Today is June 19 in the Philippines and we are celebrating 2 occasions. First, it is Father's Day. To my Tatay (English: father), "Happy, Happy Father's Day!" Second, we are commemorating the 150th birthday of our national hero, Jose Rizal. I created a Jose Rizal nail art design as a way of participating in the celebration and as an expression of my appreciation to all that he had done and sacrificed for our country.

Jose Rizal Nail Art Design 06
Jose Rizal nail art design by Simply Rins


The inspiration for this nail art was taken from the advertising poster (inset in 1st photo) used to promote Jose Rizal's 150th celebration. I have one accent nail on my left hand and my right hand represents the Philippine flag.

Nail Art: Mickey and Minnie Mouse

I personally need another fun nail art and I thought of doing a design inspired by the most famous mouse in the world! This is a Mickey Mouse nail art design. I also painted Minnie Mouse. I know how it feels to be lonely and I just don't have the heart to paint Mickey without Minnie.

Initially, I was planning to use only black and white colors for this nail design. But I figured that would be sad to look at given my current disposition. Sigh. And so I decided to make it more colorful by playing with the cartoon characters' usual colors.

Mickey Mouse nail art design 03
Mickey Mouse nail art design by Simply Rins


I used the following nail polishes for base colors:

Nail Art: Pirates of the Caribbean

I have always believed that Johnny Depp is a very talented and versatile Hollywood actor. He has proven so in most of his movies wherein he portrayed unique characters. To name a few of his movie portrayals that I admire are Edward in Edward Scissorhands, Charlie in Charlie and the Chocolate Factory, Mad Hatter in Alice and Wonderland, and Captain Jack Sparrow in the movie series Pirates of the Caribbean.

The 4th installment of Pirates of the Caribbean: On Stranger Tides is now showing (May 20, 2011) here in the Philippines and in most countries. I haven't missed any of the movie series and I will definitely not miss the latest. This latest nail art design was inspired by the movie, particularly by Johnny Depp's character -- Captain Jack Sparrow. I was personally challenged by this one as I was a little afraid that my drawing of the character might not look like Jack Sparrow!

Pirates of the Caribbean nail art design by Simply Rins


I used 2 coats of Orly Goth as base color except for my accents wherein I chose Essie Marshmallow. I painted everything else using acrylic paint and sealed my design using Seche Vite Dry Fast Top Coat. I made 2 accent nails (again). I painted Captain Jack Sparrow on my left hand and the skull logo on my right.

Nail Art: The Little Mermaid

What is your favorite fairy tale?

Mine is the story of The Little Mermaid and my favorite movie adaptation was the one released by Walt Disney Pictures on 1989. This is a story of a young mermaid who was willing to sacrifice her tail to win the love of a human prince.

In a recent nail art challenge, participants were asked to create a nail design that complies with a Disney inspired theme. I only had The Little Mermaid in mind for the challenge. I can't imagine doing anything else. And so I created a Little Mermaid nail art design. This is by far, the hardest design I have painted on my nails.

The Little Mermaid nail art design by Simply Rins
The Little Mermaid nail art design by Simply Rins.


In the film, the little mermaid was named Ariel and she had a fish best friend called Flounder. She collects human things from sunken ships and goes to Scuttle, a seagull, to identify those she collected. In the movie, Ariel valued freedom and embraced curiosity above all else. This personality led her father, King Tritan, to assign a paranoid crab named Sebastian to look after Ariel. He was to make sure that our little mermaid stays under the sea and not follow her curiosity to explore the surface. But nothing could stop Ariel from surfacing that eventually led to love. Ariel fell for a human prince and she sacrificed her beautiful voice to the sea witch so that she could have legs and gain a chance to win the prince's love. In the end, their love conquered all. King Tritan gave her daughter legs and Ariel and her prince lived happily ever after.

Nail Art: Manny Pacquiao

The Philippines is rejoicing with the recent win of Manny "Pacman" Pacquiao, pound-for-pound best boxer in the world, over pound-for-pound legend, Shane "Sugar" Mosley on May 08, 2011 in Las Vegas. His victory has made the Filipinos proud once again.

I am not really a fan of any sport. In all honestly, I haven't watched any of Pacquiao's fights in full. The only time I do watch is when I find myself with a family member that is watching the boxing match. But I am a fan of the boxer that brought so much honor to the Philippines. I painted my nails in your likeness to join my countrymen in celebrating your latest feat.

I am proud to share with you my Manny Pacquiao inspired nail art design.

Manny Pacquiao nail art design by Simply Rins
Manny Pacquiao inspired nail design by Simply Rins.


I have 2 accent nails. I painted the face of Manny on my left hand and a representation of the Philippine flag on my right. I left the other nails plain. I think the Pacman deserves the limelight on my nails right now.

Manny's real name is Emmanuel Dapidran Pacquiao. He's the first boxer to win 10 world titles and the first to win in 8 weight boxing divisions. He was tagged "Fighter of the Decade" on 2000.

Nail Art: Butterflies and Flowers

Based on my timezone *grins*, Mother's Day is tomorrow and I'm dedicating this butterflies and flowers nail art design to my Nanay (mother) who have been unconditionally supportive of me and my love for the arts!

Mother's Day happens in the Philippines and in some countries every first Sunday of May. Others celebrate it on February, March, or April. If you are curious to find out when Mother's Day is celebrated in other parts of the world, you may check it here.

I have for you butterflies and flowers as a nail design for Mother's Day. I used 2 coats of Orly Samba as base coat and Essie Marshmallow for the accent nails. The 2 butterflies were painted using acrylic.

Butterflies and Flowers nail design by Simply Rins
Butterflies and flowers nail design by Simply Rins


I photographed how I painted the butterflies and hopefully you will be able to get some tips on nail painting.

Butterfly Nail Art Tutorial:

Nail Art: Cupcake Using Konad Image Plates

Last month, OC Nail Art held a nail art contest through their Facebook page. The challenge was to create a nail design on your hands and feet using only Konad products such as image plates and special polishes. The only exemption is the base color, wherein participants are allowed to choose any brand of nail polish they prefer. Designs must be posted on the OC Nail Art Facebook Page and must show both manicure and pedicure having designs on all 5 toes and fingers.

Several weeks passed and I still haven't decided on a design yet. I wanted to create a design that will show how versatile Konad stamping nail art can be. I wanted to show that truly, imagination is the only limit using Konad products, specifically, its image plates. So after a long while, I decided to recreate my Cupcake nail art using the few Konad plates that I have.

Here's the result:

Konad cupcake nail art
Cupcake nail art using Konad image plates by Simply Rins!


You have to forgive me because I failed to take separate photos of my hands and feet! I was actually engrossed into taking a decent picture of both my mani and pedi in 1 single shot that I totally forgot to do separate shots! @_@

Valentine's Nail Art: Bed of Roses

Valentine's Day is almost around the corner and I've decided to post a few nail designs for the occasion. For girls who'd like to dress their nails, I hope you'll be able to find inspiration in my Valentine's nail art designs. This is the first installment to a series of valentine's inspired nail art and I simply called it "Bed of Roses". :)

As most of you have probably observed, I don't usually make floral nail designs. My being a cartoonist greatly influenced my nail art and hence, I've been practicing freehand designs. I'm loving it. It gives more flexibility to any nail artist. Anyway, I've been talking to a fellow nail enthusiast that is really good in floral nail designs and she inspired me to try it out. Unfortunately, I don't really know where to start so I searched the Youtube channels for floral nail art tutorials and I found this video by sewcrafty1. It's a rose nail art tutorial using simple dots. I recommend that you watch it here.

After several practices, I finally came up with this Valentine's nail design using the technique I learned from sewcrafty1's tutorial:

Valentine's nail art design
Valentine's Nail Design: Bed of Roses by Simply Rins

Nail Art: Proud of the Philippines

First of all, I'd like to greet everyone a happy Chinese New Year! I know I said that I'd be posting another CNY nail art but I got busy with work and I'm letting my nails grow and rest a little. I'll be making Valentine's nail designs very very soon. :)

For the meantime, let me share with you this nail art design that I submitted as an entry to Parokeets' Nail Art Challenge: Show Off Your Country. I've been meaning to do something like this and the challenge was the perfect opportunity to do a nail design that is inspired by my country, the Philippines.

Here's the nail design that I submitted:

Philippines nail art design
Philippines nail design by Simply Rins