
Christmas Wreath nail art by Simply Rins
I used Lucidarling White as base color. You may choose to use other shades of white polish for your base. But I do like this particular shade because of its shimmer that adds something extra that's apt for the season. :)
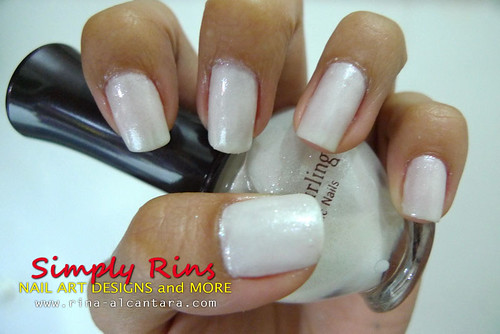
Lucidarling White in 2 coats
I did mention that this Christmas nail art is religiously inspired. It's because the wreath in Christianity is actually the symbol for Advent -- the coming of Christ. It is more popularly known as the Advent wreath that actually consists of 4 candles to symbolize the 4 weeks of the Advent season. And so, when you celebrate mass in the Catholic Church during this season, you'll most probably see a horizontal wreath in the altar area. The number of candles that are lit represents the number of weeks into the Advent season.
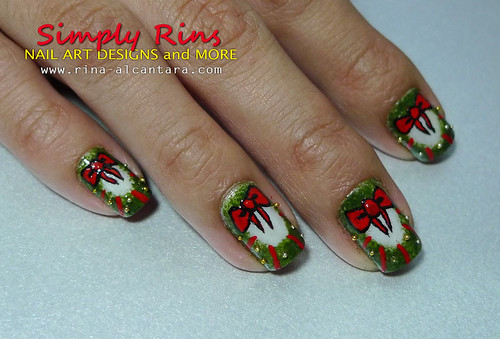
A Christmas wreath for every nail.
No, there aren't any candles in my Christmas wreath nail art. I painted the decor type of wreath. But yes, I went a little crazy and painted one in each and every single nail. I really liked how it turned out and I think this design is quite simple so I did a tutorial for anyone who would like to give it try. :)
Christmas wreath nail art tutorial:
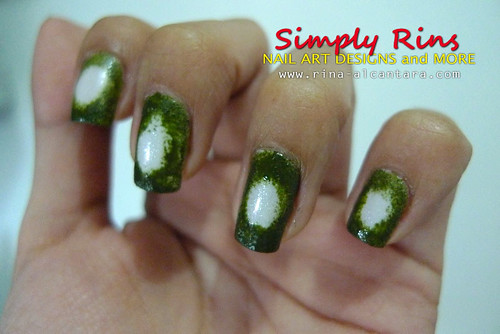
1. After applying a base coat and a base color, create a green border on your nails using a sponge to create a leafy effect. Make sure the center is circular to make it look more like a wreath.
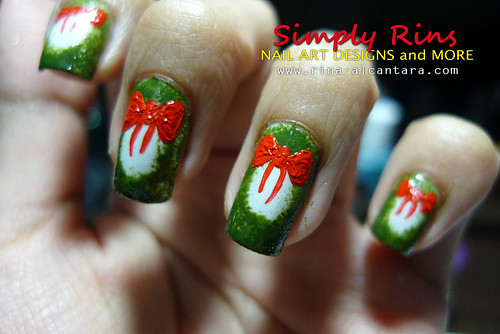
2. Draw a red ribbon on top of the wreath. You may choose to draw a ribbon at the bottom without showing the ribbon ends. To make things easier, you may use a dotting tool for the middle knot of the ribbon. :) Ribbons are not hard to draw. Add 2 triangles on both sides and paint 2 slightly curved lines for the ends.
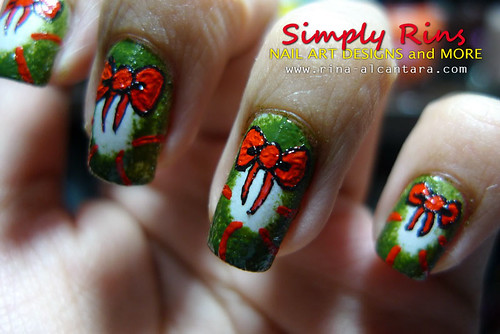
3. Continue to decorate the Christmas wreath with random red diagonal lines to appear that a ribbon is wrapped all around the wreath. You may choose another color for this if you wish. I think a silver ribbon will look good as well.
I also added outlines for the ribbons but this can be an exception. The design will look fab even without outlines.

4. Add gold microbeads at random areas to complete the design. You may add another color if you want. I would have love to but I really do have small nails so I if I do, the design would look a little crowded.
Don't forget to let everything dry before sealing your nail art with a top coat.
If you get inspired to try this and have questions, please let me know. I'll be more than happy to answer any inquiries. And if you do try this Christmas wreath nail art, I hope you can share with us how it went and how it turned out.
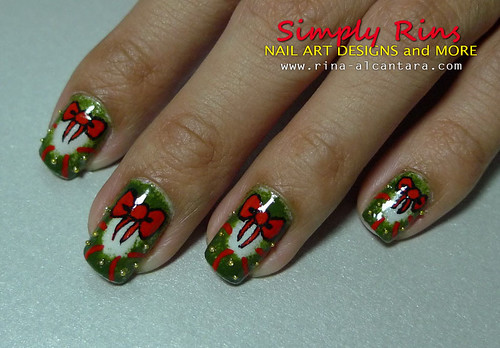
More Christmas wreaths!

If only I can make the gold microbeads to shine, this Christmas nail art would look lovelier.
----------
A Christmas Gift for Simply Rins:
I joined a nail art contest hosted by Nail Art World with the theme "Flowers" and this is my entry:
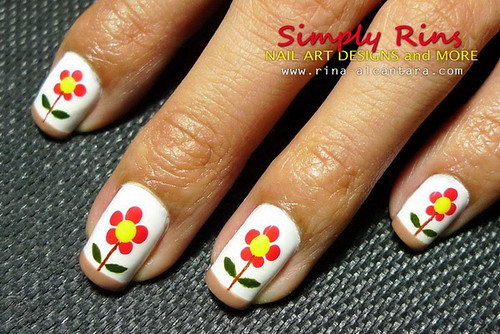
Flowers nail art by Simply Rins
I used 2 coats of Essie Blanc as base color, 2 coats of Dashing Diva Chocolate Charlotte for the brown tips, China Glaze China Rouge for the petals, Elianto Yellow for the flower stigma, and Zoya Kelly for the petals.
Can you believe that this is actually my first attempt to create a floral nail art using freehand? This was what propelled me to join this nail art contest. I wanted to come up with something simple and cartoon-y. If you like my flowers nail art, you can go to Nail Art World and check #5 at the poll located at the upper right sidebar. All the other fabulous entries can also be found on the site.
To all those who already voted for my entry prior to this post, thank you so much! :)
SHARE THIS:


I just LOVE the first design! Maybe I would dare to try it myself.... :)
ReplyDeletesuch great detail on the wreath nails!
ReplyDeleteaww, the flower nail art is super cute :)
Wow, that looks great! The steps make it look so simple to do.
ReplyDeleteFabulous as always! I going to vote right now. Muahaha!
ReplyDeletelove the flower design.. so cute and simple =)
ReplyDeleteThese are very cool!
ReplyDeleteboth designs are adoreable!!! i may give the wreath a try. it's snazzy but not too complicated :)
ReplyDeleteThose wreaths are magical! I also really like how your flowers turned out.
ReplyDeleteThe wreaths is such a stellar idea! AMAZE.
ReplyDeleteAnd I am super fond of your flowers. <3
omg , amazing !!!
ReplyDeleteyou are good , you have an incredible imaginations !!
ReplyDeleteHi, girls! Thanks a lot for your wonderful comments! :) I'm currently preoccupied this week but I'll make sure to post a new design within the week.
ReplyDeleteplease create a video tutorial for this design.
ReplyDeleteHi! I wish I could address you properly with a name. :) The images on this tutorial is clickable so you can get a larger picture. I will try to accommodate your request before Christmas. :)
ReplyDelete