I made a cute bunny video nail art tutorial to those who might be interested to paint one for Easter. The video is also a respond to requests to show how I paint my freehand nail designs. But before I show you the Easter bunny nail art tutorial, I would like to share with you a sad story about my nails.
Two months ago, my nails suffered serious breakage. For reasons I can't seem to pinpoint, they all became brittle and easily broke. I had to file them all down and the sight of my really really short nails were disheartening. A week after this nail disaster, I had an important event to attend. I went to a nail salon to have acrylic nail extensions done as I just could not bear not wearing any nail art for the occasion. A few days after, I became uncomfortable with my artificial nails so I decided to remove them. Problem is, instead of having them removed professionally, I did it myself and that made all the difference.
I soaked my nails in nail polish remover with 80% acetone for 5 minutes intervals and scraped the softened acrylic off my nails using a metal pusher and filed like crazy. Little did I know that I was already damaging my natural nails. As a result, my nails became so thin and brittle that it was impractical to wear them in any length. I had a wait a few weeks to be able to shape my free edge decently.
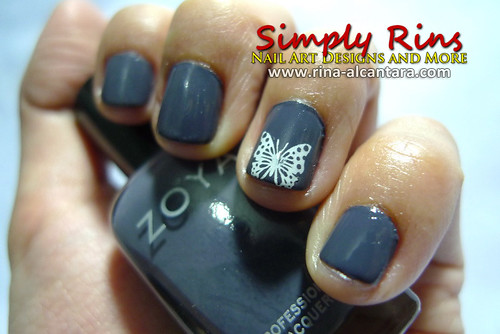
Here is a picture of my nails right now just to give you an idea how short my natural nails really are:

My very short nails polished with Zoya Kelly.
Are they short or are they really short?!
I know that I needed to let the damaged nails grow out so I've been filing them down whenever there is visible nail growth. I also know that it would take time for my natural nails to recover and reach the length I prefer. They say that patience is a virtue. I'm putting mine to test as I wait for my nails to grow back. For the meantime, I am challenging myself to create nail designs with my nubbins!
Consequently, expect this cute bunny video nail art tutorial done on my short nails. I was experimenting on camera positions and lighting and clearly I need to adjust some settings. Hopefully, succeeding video tutorials will have better quality.
Yes, you may scold me for not taking pictures of the finished bunny nail art. I got excited to upload the nail art tutorial on my laptop that it didn't occur to me that I didn't take photos!
I just realized that this is my 3rd bunny nail art! I previously did a Bugs Bunny and a Year of the Rabbit nail design.
I hope you enjoyed the video. :)
SHARE THIS:


As an individual who seems destined to have short nails I appreciate nail art done on shorter nails. The video is great and I love love how you never block the camera with your working hand as so frequently happens.
ReplyDeleteI loved the tut! I have short nails too!
ReplyDeleteBy the way, I tag you
http://liiyueh.blogspot.com/2011/04/tag-10-things-i-love.html
thanks for this tutorial :-D
ReplyDeletebut i'm not sure if this will work for me, i'm not that good with paints :-(
To Anita: Whenever I wear my nails short, I feel like they belong to a kid. I'm sure your short nails look better than mine. My nubbins are shaped quite decent now. I will try to create nail designs with short nails. As for the video, I never realized that until you mentioned it! The lighting needs work though, I think it is too bright. :)
ReplyDeleteTo liiyueh: Thanks for the tag! :)
To nail crazy: Have you tried it?
thats so cute!!! cant wait to try it!!
ReplyDeleteYour nail arts are just amazing!!! I wish I could try it but I have very short nails.
ReplyDeleteTanya
http://tardydresser.tumblr.com
Thank you so much for the tutorial, the bunny is so cute, it kinda reminds me of Roger Rabbit :D
ReplyDeleteAwww I think your nails look very cute short too!