First and foremost, color your nails with your choice of nail polish. I recommend putting one layer of top coat and letting it dry before you use the Konad Stamping Nail Art. The top coat will be very helpful when you accidentally make a mistake when stamping. Simply get a cotton ball with nail polish remover and gently remove the stamped design. This will not ruin your nail polish and simply repeat the stamping procedure.
These are the things I use:
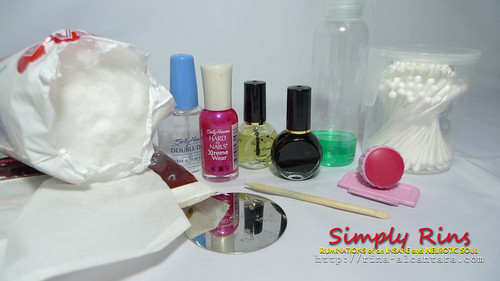
I place all the things I need on the table before doing the actual stamping. It's easier to have everything you need on reach so you don't have to look for things in the middle of your nail art-ing. I use the following: tissue, cotton, nail polish, top coat, Konad special polish and top coat, nail polish remover, Konad image plate, Konad stamper and scraper, cotton buds, and an orange stick.
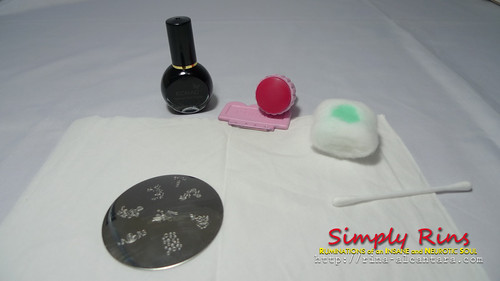
The first thing I do is lay down a couple of tissues on my working table. Since I don't have the Konad template holder, I find the tissues sufficient in keeping the image plate from slipping. Personally, I don't think you'll need the template holder since you'll be using your fingers to hold down the image plate when you're scraping. You just need a flat and sturdy surface. The tissues will protect your table from getting stained by nail polishes.
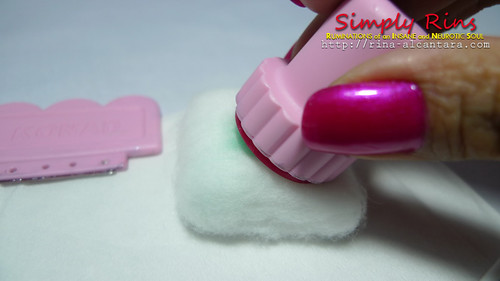
I also prepare a cotton with nail polish remover so I could easily clean my stamper every after use. One downward stroke from the cotton soaked in polish remover will do.

Tilt the scraper approximately 45 degrees when scraping excess nail polish. Otherwise, you will be having a harder time scraping. You don't have to apply too much pressure in doing this. What's important is to make sure the steel blade lays evenly upon scraping. Support the image plate with your other hand.
As for the scratches that your image plate will encounter, I've read that using the Konad plastic scraper will prevent this. Others suggest that you use an old credit card as a substitute to the plastic scraper. I tried using this and it didn't have the efficiency of using the Konad scraper because the card bends even if you cut it in half. But you can try this and see if it will work for you. Hopefully, I'll be able to have my own Konad plastic scraper and see if it is as efficient as the steel blade scraper. You may purchse the Konad plastic scraper at www.konadnailart.com
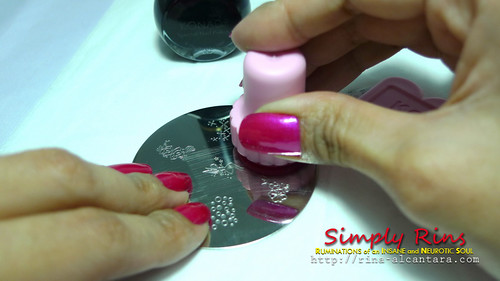
Instead of rolling the stamper to lift the design from the image plate, I simply press it down firmly. I had a problem with the rolling method because most of the time, I don't lift the entire design. I figured it must have something to do with the consistency of my pressing down and rolling at the same time. Firmly pressing down the stamper into the design seems easier and it works well with full nail designs or the smaller ones. You may support the image plate with your other hand.
This is something you should NOT do:

Do NOT clean your scraper with the cotton ball when you're still doing your nail art because chances are, you'll have cotton fibers sticking into the scraper. You don't want this because it can go to the image plate, then to the stamper, then to your nail.

If you need to clean your scraper during stamping, I suggest using a cotton bud soaked with nail polish remover. By using such, you don't have to worry about ruining your nails or having cotton fibers stuck into the scraper.
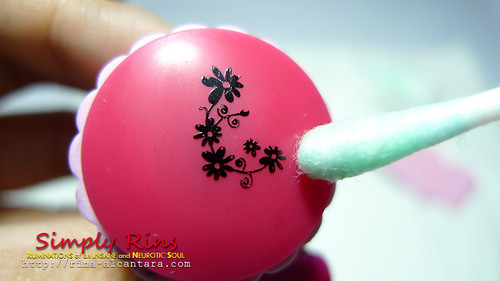
I also use the cotton bud to clean excess nail polish on the stamper. It sometimes happen that excess polish goes into the stamper when you lift your design. You can also use the cotton buds to clean your stamper after every use if you don't like using a cotton ball soaked in nail polish remover. Although, I think the latter is easier and more effective.

I use the cotton bud with polish remover as well whenever I need to clean my image plate in the middle of my stamping. I realized that every time I lift the design from the page, some nail polish are still left on the design. After several stamping, I've noticed some inconsistencies with the thickness when I lift the design from the plate. And so to avoid this, I sometimes clean the image plate in between stamping. This will also eliminate some nail polishes left from scraping around the design.
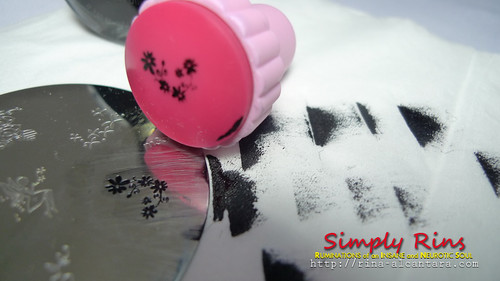
Move the image plate from time to time during stamping to avoid nail polish build up on the edge of your template. This sometimes causes a problem because the nail polish from the edge after scraping can get into your stamper. You don't want this because it can go to your nail or your finger while you're handling the stamper.
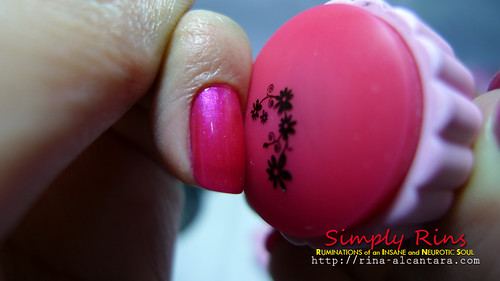
Stamping the design into your nail is perhaps the trickiest part of the process. When doing a full nail design, you don't have to worry about centering the design. But if you're working with a smaller design and you'd like to place it in the center of your nail or on a specific location, I find it easier to do so by placing the stamper with the design on the edge of my nail. This way, you'll be able to approximate where the design will go. When you're satisfied, do a gentle rolling motion to stamp your design. Do not press too hard because chances are, the design will smudge.
Is it possible to use other nail polishes for stamping? Yes. The trick is to rub your stamper with a nail buffer for the other nail polishes to work with it. This will make your stamper a little rough and consequently the polish will adhere to it better. Although, based on my experience, using the Konad Special Nail Polish is still best because it's thick in texture and doesn't dry too fast. If you're going to use other nail polishes for stamping, you need to act quicker.
Is it possible to use another brand of top coat after stamping? Yes. You just need to let your design completely dry before applying your top coat. Or, the trick is to not brush the same area more than once and do so lightly. Letting the nail polish brush go the same area more than once can smudge your design if it is not yet completely dry.
SHARE THIS:


What remover are you using to clean the plate and stamper?
ReplyDeleteAny nail polish remover will do for cleaning the plates, scraper, and stamper. :) I'm using a regular nail polish remover from a local department store that's 30% acetone.
ReplyDeleteThnx for answering! The one I use leaves a film on the plate and stamper so I guess I need to keep looking. Congrats on your blogiversary!
ReplyDeleteIf it leaves a film on the plate and stamper, it is probably composed of more acetone. Look for a nail polish remover that's milder (so to speak). Try the Bobbie brand. :) Good luck and thanks for the greetings! :)
ReplyDeleteThanks so much for this! I have been having some troubles, but you really cleared them up for me! Thanks!
ReplyDeleteLove using nail stamping kits? Check out my blog and youtube channel for awesome ideas, tips, tricks, videos and tutorials! http://creativenails.blog.com/ and http://www.youtube.com/user/NailMasterDesigns?feature=mhee
ReplyDeleteI always use non-Konad polish, I never have issues with it. I find the Konad polishes harder to pick up, so I threw them out!
ReplyDeleteThanks for this! I tried using your tips and the process was a lot less frustrating!
ReplyDeleteThe remover your using that leaves a film on the plate has oil in it. Thanks for the tips.
ReplyDeleteWhere do you get the stamping image plates from? And do they have to be the ones made by konad?
ReplyDeleteDo you have to use konad image stamping plates? And where do you get them from?
ReplyDeleteWhere do you get the stamping image plates from? And do they have to be the ones made by konad?
ReplyDeleteCan you go into a little more detail about buffing the plates if not using konad polish. I'm absolutely having a hard time with this!
ReplyDeleteI'm excited to try again after reading this though. Thank you!
You can actually use any completely opaque nail polish on the image stamps. You can even go on eBay and buy a generic, or what's otherwise known as "fauxnad" stamper and scraper alone and buy your favorite image plates separately. curso como fazer carimbo de unhas funciona
ReplyDelete